
Shortly after Phase I, Nick removed all of the cabinet doors from the kitchen in preparation for Phase II. We went to Lowes and bought this kit:

The first step is to degloss every surface that is getting painted. Their special formula eliminates the need for any sanding, stripping, or priming! This took about a day--I did the cabinet frames and Nick did the doors. Next we got started on painting! It was VERY white and had me nervous that we picked a shade that was too light. We decided 3 coats looked the best, and each coat had to dry at least 2 hours in between. It has taken a couple of days now to get to this point, and we still have about 20 cabinet doors to go!
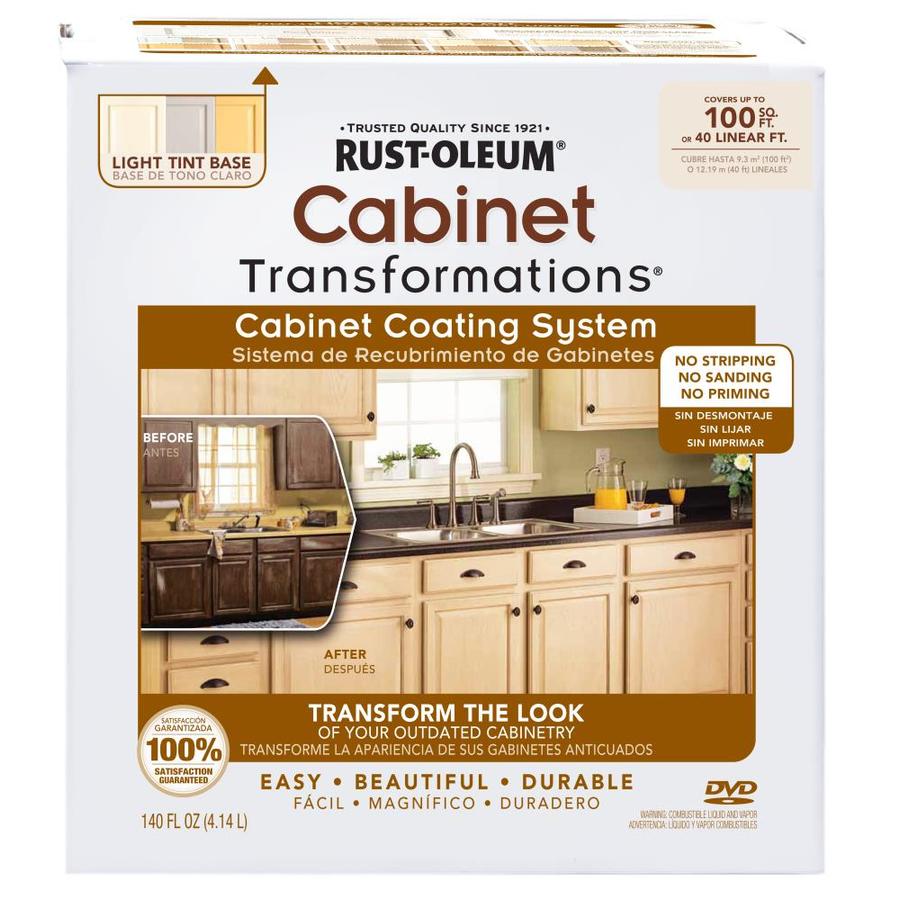
It is an all-inclusive kit that contains everything (except brushes) that you need to refinish your cabinets. It came in two sizes--100sqFt or 200sqFt--and two shades--light or dark. We chose the large one in the light shade. We had the base coat tinted for the color we wanted and we were ready to go! Honestly we were very nervous about painting over our cabinets. They were very dark stained wood and once you make that first brush stroke there is no turning back! We were going for an antiqued off white color.

We moved my car out of the garage and have a little assembly line set up on a tarp for the doors. We have 37 doors altogether and can not fit all of them on the tarp at the same time. So that means we have some that are painted on both sides and ready to antique, and some that only have paint on one side. Plus there are a few that having nothing on them because they are still waiting their turn!
We actually started the antiquing/glazing process today. We watched all of the instructional videos to learn the technique for the look we wanted, and crossed our fingers that it would turn out okay. In the end, we were pretty happy with the look it gave the doors, and I was relieved to see the stark white go away. Here you can see the doors on the bottom have already been painted and now have glaze on one side, and the doors on top are still getting painted, and will need to be flipped over when dry....

We also antiqued all of the framing inside the kitchen and all of the little walls today. We can actually put the sealant coat on them tomorrow! The glaze has to dry for at least 8 hours, and the sealer has to set up for 24 hours before you put the doors/hardware back on. Honestly now that we have gotten this far, we have barely used half of the amounts in the kit. I am planning on listing the rest of the kit on craigslist when we are done! Here are my new shelves (that are getting a custom door built for them) that we have painted, glazed, and I put liner on them tonight...

Speaking of hardware...I have been hunting for a couple of weeks for a good price on knobs and drawer pulls. I knew I could get a steal somewhere--I just had to find where! We originally were going to get all new hinges and everything in black, but we were sorely disappointed to see that the hole pattern in similar new hinges were just a hair off and we would have to drill all new screw holes.....no thank you! Our current hinges are kind of an aged bronze color so we decided to keep them, get knobs to match, and change the color of tile backsplash we were planning on.
Today I hit the jackpot and finally found a great website with amazing prices on hardware and shipping! The knobs and the drawer pulls were less than $1 each, and we even found a great pendant light for above my sink that matches.


I would comfortably say that we are 75% done with the cabinets, and maybe half done with the kitchen remodel!! The next step is the countertops, then the backsplash. I will post another blog when we are all done with the cabinets so you can see our hard work!


No comments:
Post a Comment
Show some love and tell me what you think! Don't forget to check back often for new posts.