.

This blog was started in 2008 when we did IVF for the first time to build our family after 5 1/2 years of infertility. We now have 17 and 11 year old boys (thanks to modern medicine) and we are enjoying our blessed life as parents ♥ In the summer of 2016 we took another huge step and moved across the country from Oklahoma to New York! This blog is about life and everything in between


Saturday, November 16, 2013

Frugal Living: Entertainment

I have been wanting to start a series of posts on a frugal lifestyle (for those interested) so here it is! I made a list of all different categories and each post will cover one. Today I will start with: 
Entertainment
  1. TV/Cable--At one point, we had expanded cable as well as digital cable. This easily adds up to around $75 per month with our local provider. As time went on, we realized that we were only watching a few channels most of the time, and there were SO many commercials! Plus the price went up every few months. We eventually dropped digital cable and stuck with expanded cable for a bit longer, but we decided once and for all to cut the cable! There were still shows and such that we wanted to be able to see, so to replace our lost cable channels we did research and decided on a Roku. We bought the basic box for about $50 and quickly learned how to use it and navigate the channels. Basically a Roku is a streaming media box for your TV that uses wifi to allow you to receive hundreds of free "channels", as well as access to several paid channels. The free channels cover your news, celebrity gossip, weather, music, B movies, old movies, and less popular/older TV shows. The paid channels cover pretty much everything else depending on how much you want to spend. Some charge an annual fee, some charge a monthly fee, and most have a free week or month trial period. The paid channels we subscribe to are Netflix ($7.99/mo) and HuluPlus ($7.99/mo). We are very happy with this setup and have had it for over 2 years now! We use an antenna for our local news channels in HD, and the Roku for everything else. Total savings = $75+ per month down to $16/mo
  2. Movies--Honestly, we rarely go out to the theater. But when we do, we know the theaters that have cheaper ticket prices. Just the location can change the price a few dollars. Also a matinee is going to be cheaper than an evening showing, plus there will be less people! You get the same experience for less money. If you are an old married couple like us, you don't need the thrill of a late night movie date. Renting movies is also a cheaper option, including Netflix, Redbox, or PPV. Total movie ticket savings = $10+ per ticket down to $7-8/ticket
  3. Magazines--Once you subscribe to a magazine you start getting advertisements in the mail for similar titles at a discounted rate. That discounted rate is what I wait for! My magic number is $5/yr for a magazine. I typically have 2-3 subscriptions at a time depending on whose discount is better. For example, I subscribed to Woman's Day which led to getting an ad for Better Homes and Gardens at only $5/yr. The standard yearly rate for BHG is over $40! When I get my annual renewal I will cancel it unless the rate is low enough. Just give it a month or two--they will give you a better price to get you back! Total savings = $40+ per year down to $5/yr
If you can think of other things to be included in the "Entertainment" category, feel free to comment! Check back for more posts!


Photobucket

Monday, November 11, 2013

Belated Halloween Pictures

11 days later....here are a few more Halloween pictures! I took Brad to a local church fall fest where they had lots of games and face painting. He had a fun time, and actually sat very still to have a ladybug painted on his face!


That day at school, the kids were allowed to wear their costumes. It was pretty warm but he wore his skunk outfit for most of the party. I had to work that day, but Nick was able to go to the school party and takes some snacks. Thankfully he also took my camera and got some pictures!


I was able to get off of work around 4pm that day with just enough time to come home for dinner before trick-or-treating! We walked around from 6pm-9pm and he got a TON of candy. We had to stop at the house to empty his bucket 3 times! He is still eating on it and I know he had a wonderful time. His little costume got a workout for the second year in a row, so we will have to come up with a new one for next year!
Photobucket

Saturday, November 9, 2013

Kitchen Remodel Phase II Complete! Rustoleum Cabinet Transformations Review

The cabinets are done! They have actually been done for over a week, I just haven't gotten around to taking "after" pictures for a blog! I have really struggled to find good "before" pictures. My archive of digital pictures before 2008 has been missing for a long time and I thought I had kitchen pictures from when we bought our house in 2006 saved somewhere else. Turns out, I didn't! I did fine one photo that I had scrapbooked, and Nick was able to hunt down some old pics from when our house was listed for sale.

Now I can show you what the old cabinets looked like, how they look now, and how we rate the usability of the Rustoleum Cabinet Transformations kit.
BEFORE


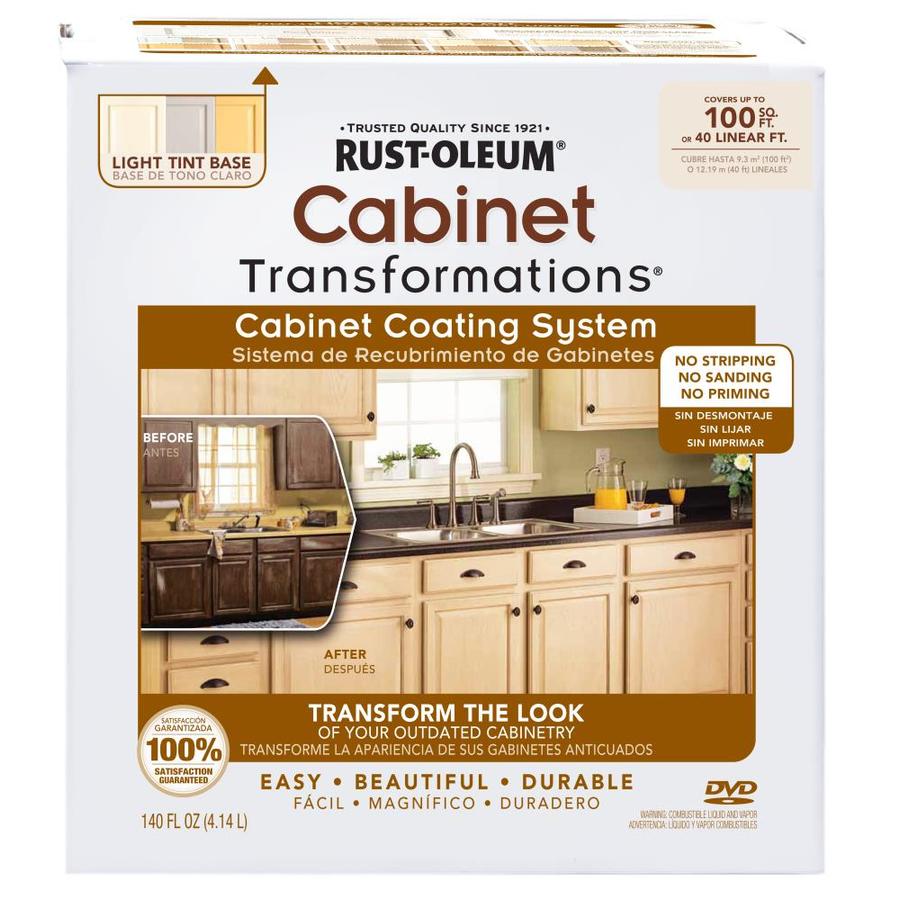
So this is the kit that we used:
We bought the large "light" color kit and had it tinted to Pure White. Our intentions were to aim for an off-white color with the glaze that comes in the kit. We were pretty worried about how white the base coat was, but once we started the glazing process it all came together nicely! Now we have everything sealed, new hardware on, and we are ready for the next phase of our kitchen remodel!


\/ You can see our new pendant light over the sink here!


We did heavy glazing in the corners and edges so that the cutouts and shapes of the doors would stand out for dimension. We also tried to put a heavier coat of sealer on the doors/drawers that used the most. Since we had so many doors, we did them in 3 batches in our garage. The first batch we did 3 coats of base paint on to thoroughly cover the wood. When we glazed those doors, we realized that was unnecessary and only did 2 coats on the remaining doors. We could not tell a difference!

You can read more about this process from start to finish in this post: Cabinet redo in progress


Now for the pros and cons of this kit!


Pros:
Much more affordable than other options of refacing/replacing cabinets
Pretty much any color you want is available
Option to glaze or leave solid paint
Almost everything you need is in the kit
For the most part it is easy to apply
Deglosser works very well to replace step of sanding wood

Cons:
Each step that requires a long dry time really lengthens the process
Deglosser has strong fumes
Glazing process is VERY particular and hard to match shades on everything
Any ding/dent in the wood is accentuated by the glaze (kind of adds to vintage look though)

Since it has only been a few weeks that we have had this done, I really can't comment yet on the durability and how it withstands wear and tear. My other gripe was that I was sure we would need the large kit since our kitchen is big and we had 37 cabinets and 10 drawers to paint! I was wrong--we only used half of everything in the kit and surely could've gotten away with the small kit.

Overall we are both very pleased with the look of our cabinets now and impressed how well it covered the dark wood stain that was on there previously. Everyone that see them in person comments on how it looks professionally done! That has to be a good sign.

We will commence with Phase III next week! Stay tuned for updates.

Photobucket

Friday, October 25, 2013

Norman Fall Fest

I have to work on Halloween this year so I have been coming up with other festive things I can do with Brad to make up for missing it with him (yes his daddy is going to take him instead). There are all kinds of neat things around the area to do! There are several pumpkin patches, family farms, corn mazes, and festivals that don't cost much. I got a flyer recently that said tonight would be my town's first annual Fall Fest on the old Main St. with free trick-or-treating and games for the kids.

After Brad got up from his nap and we ate dinner, we heading that way! The had the street closed for several blocks and it was a challenge to find parking....but I came thru! He grabbed his bucket and we started walking up and down to check out all of the fun.

He wanted to be a skunk again--I made this costume for him last year, and he begged to wear it again this year!

 ..........this is him (3 years old) wearing it last year!


They had all kinds of neat stuff out, and most of the businesses were handing out candy. It was supposed to be from 6p-9p but by 7 a lot of them were already out of candy! There were free inflatable rides, a firetruck, music, and games.


 He had a ton of fun and happy to dig into his candy on the way home. Tomorrow I'm going to try to take him to a pumpkin patch for more good times!

I have some more updates on the kitchen, plus things I've been crafting but I will save those for another blog! Check back soon!

PS. I just started a Twitter account to try and wean off of Facebook....feel free to look me up! @kandydpierce

Photobucket

Monday, October 21, 2013

Kitchen Remodel -- Phase II In Progress

Shortly after Phase I, Nick removed all of the cabinet doors from the kitchen in preparation for Phase II. We went to Lowes and bought this kit:
It is an all-inclusive kit that contains everything (except brushes) that you need to refinish your cabinets. It came in two sizes--100sqFt or 200sqFt--and two shades--light or dark. We chose the large one in the light shade. We had the base coat tinted for the color we wanted and we were ready to go! Honestly we were very nervous about painting over our cabinets. They were very dark stained wood and once you make that first brush stroke there is no turning back! We were going for an antiqued off white color.

The first step is to degloss every surface that is getting painted. Their special formula eliminates the need for any sanding, stripping, or priming! This took about a day--I did the cabinet frames and Nick did the doors. Next we got started on painting! It was VERY white and had me nervous that we picked a shade that was too light. We decided 3 coats looked the best, and each coat had to dry at least 2 hours in between. It has taken a couple of days now to get to this point, and we still have about 20 cabinet doors to go!


 We moved my car out of the garage and have a little assembly line set up on a tarp for the doors. We have 37 doors altogether and can not fit all of them on the tarp at the same time. So that means we have some that are painted on both sides and ready to antique, and some that only have paint on one side. Plus there are a few that having nothing on them because they are still waiting their turn!

We actually started the antiquing/glazing process today. We watched all of the instructional videos to learn the technique for the look we wanted, and crossed our fingers that it would turn out okay. In the end, we were pretty happy with the look it gave the doors, and I was relieved to see the stark white go away. Here you can see the doors on the bottom have already been painted and now have glaze on one side, and the doors on top are still getting painted, and will need to be flipped over when dry....


We also antiqued all of the framing inside the kitchen and all of the little walls today. We can actually put the sealant coat on them tomorrow! The glaze has to dry for at least 8 hours, and the sealer has to set up for 24 hours before you put the doors/hardware back on. Honestly now that we have gotten this far, we have barely used half of the amounts in the kit. I am planning on listing the rest of the kit on craigslist when we are done! Here are my new shelves (that are getting a custom door built for them) that we have painted, glazed, and I put liner on them tonight...


Speaking of hardware...I have been hunting for a couple of weeks for a good price on knobs and drawer pulls. I knew I could get a steal somewhere--I just had to find where! We originally were going to get all new hinges and everything in black, but we were sorely disappointed to see that the hole pattern in similar new hinges were just a hair off and we would have to drill all new screw holes.....no thank you! Our current hinges are kind of an aged bronze color so we decided to keep them, get knobs to match, and change the color of tile backsplash we were planning on.

Today I hit the jackpot and finally found a great website with amazing prices on hardware and shipping! The knobs and the drawer pulls were less than $1 each, and we even found a great pendant light for above my sink that matches.

I would comfortably say that we are 75% done with the cabinets, and maybe half done with the kitchen remodel!! The next step is the countertops, then the backsplash. I will post another blog when we are all done with the cabinets so you can see our hard work!

Photobucket

Saturday, October 12, 2013

GW Animal Park

Brad has been on fall break these last few days and unfortunately I had to work all of them. He did get to spend a couple nights with his grandparents out in the country and he had fun. We had planned to head up to NW Oklahoma and rent a dune buggy for the sand dunes. The bad news was that when we called they were all booked up for over a week and there would be no where to rent a buggy.

We brainstormed and came up with a few other options and decided on GW Animal Park out in Wynnewood. We were going to try Arbuckle Wilderness too, but I read a lot of bad reviews from recently after their management changed and they got rid of their exotic animals.

It was about an hour drive from our house and right off the highway. The admission price is a little higher than I like, but it's completely ok because all of the animals there are rescued and the money goes to their upkeep.


Despite it being October, it was actually pretty warm today and most of the animals were sleeping while we were looking around. I guess it was their nap time!


There were several tigers, a couple lions, a few bears, racoons, monkeys, snakes, skunks, cockatoos, a wolf, hyenas, as well as loose geese, chicken, roosters, and turkeys running around. It was a fun day! We had a late lunch in Pauls Valley when we got done then came home and relaxed.

Photobucket

Friday, October 11, 2013

Kitchen Remodel -- Phase I

What have I been doing you ask? Well we have begun our kitchen facelift! I wouldn't call it a full remodel--we are keeping our current cabinets and countertops, but we are refinishing them all. We are also getting all new appliances (except for a fridge b/c it's only a couple years old).

When Nick and I first started discussing this, I brought up the idea of knocking out the cabinets beneath our cooktop to put in a combo stove/oven so that everything was together in one spot. I figured this would be too expensive because it would not be a DIY job like the rest of the kitchen projects. We decided against it and were planning on just replacing all of the current appliances with new models in black.....until we started pricing things!

Here is the "before" oven and microwave....


....and the "before" cooktop with cabinets below. They are all about 20-30 years old. They still work but are inefficient and very outdated!


We still have a distant hope of trying to sell our house again in a few years, but would like to get some enjoyment out of our updates before then. I started shopping around online for a ceramic cooktop that would replace our old stove, and found that the cheapest one ran about $500-600. Then I started pricing wall ovens and found the cheapest one of those started at around $800+. Right now we were at almost $1500 for just the baseline model oven and stove.

Those who know me are aware that I am a cheap frugal person, and that was just a ridiculous amount to spend. I glanced at a regular range that had a ceramic stove and good size oven--only about $500. I kept looking online but never really found better prices that would make me happy. So then I started thinking back to my original idea of knocking out the old cooktop and cabinets to put in a range instead. I figured with the money we would save just having to buy a range, we could pay for a contractor!

Nick brought up the grand idea that his dad Mark knows how to build a house from the ground up, so we asked him if he was interested in the job. He accepted, and came to work on it the next day! I told him exactly what I wanted, and added some custom shelving on the outer cabinets for my cookbooks. He got right to work and had it done in two days!!


Here is where the oven was.  Mark is going to put in shelves to replace the storage I'm losing under the old cooktop.

Here is where the cooktop was. We took off the cabinet doors and removed the shelves to prepare for demolition.

Mark stayed till about 7pm the first day, and offered to take our little one to stay a couple nights since he was on fall break. Of course Brad was very excited about that and got his suitcase ready to go!


I started hunting online for a new range and found several good deals. I narrowed it down to Sears, Lowes, or Home Depot. Lowes and HD both having 10% off appliance sales, plus free shipping. I decided on one ~$550 range at each place that I wanted to look at, so we went to each store to see them in person. HD didn't have much in stock at the store, so we moved on to Lowes. I didn't find the exact model I had picked, but they had a very similar one in stock that was about $50 more. We kept browsing around and I stumbled upon another range that was pretty much what I wanted and it was cheaper--$499 marked down to $439. I inquired about it to the salesperson and he said it was in stock, and that it rang up only $404! I got free shipping, and I just happened to have a $25 off coupon. Altogether I got it for only $379!

Mark came back in a couple days and finished up the shelving and installation of the stove. For the shelves we bought the wood and brackets at Lowes, then Nick painted the wood white and brackets black. Removing the counter and cabinets around the old cooktop left a little gap, so Mark installed some wood trim around the range for a custom fit. When we refinish the countertops it will all get painted the same color.


Here are the new cabinets he built where the oven was. The tall one is for cutting boards/cookie sheets, and the shelves on the right will be covered by a custom cabinet door we are having made to match the others. We will also paint the inside of these.
 

And here are my cookbook shelves! I love the brackets and rounded edges. Once everything gets a fresh coat of paint it will all look finished. I can't wait to see the end result!!


We are going to put our old appliances for sale on craigslist to try and recoup some of our costs. I already bought a new microwave and it will be installed soon.

In the end, for the price of JUST a new cooktop, we got a new range, custom shelving, and a redesigned kitchen! Our next project--painting the cabinets.....

Photobucket
Related Posts Plugin for WordPress, Blogger...